
Procedural Parallax Effect in Blender
In this Blender tutorial you’ll learn how to create a procedural parallax effect using shader nodes. Parallax mapping is a technique used to give a 2 dimensional surface a truly 3 dimensional look. It’s different than bump mapping and normal mapping because parallax mapping creates the illusion of depth, not just surface detail. And this depth is based on the perspective too, creating a convincing 3 dimensional feel from every angle. Here’s what you’ll learn about:
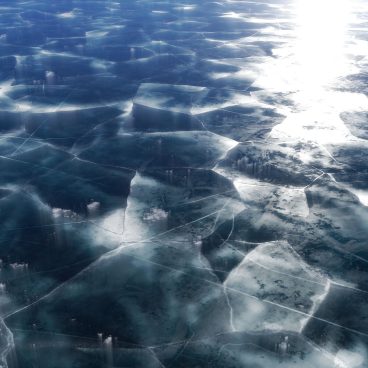
- Creating a basic ice shader using image textures
- Grouping nodes so they’re reusable throughout a shader
- Incoming Vectors from the Geometry node
- Using masks to mix texture layers
- Vector Math node options such as Reflect
- Procedural blurring using the White Noise texture
- RGB Curves node for adjusting the blur effect
This shader was originally made for this tutorial by Erindale Woodford. Check out more of his work here – https://linktr.ee/erindale.xyz
And as always, if you have any questions about the tutorial you can email me.